model:
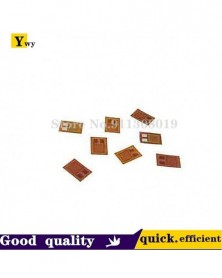
BF350-3AA Constantan Metal Foil Resistance Strain Gauge
Resistance 349.8+/-0.1 ohm
Sensitivity factor: 2.0-2.20
Accuracy level: 0.02 level
Strain limit: 2.0%
Single chip size: 7.1mm*4.5mm
Modified phenolic base, made of constantan foil, good static measurement stability, fatigue life, creep, strain limit and other characteristics, this specification is easy to paste and weld, good heat dissipation, and low power consumption per unit area.
Commonly used in general metal materials and other similar elastomers.
1. Classification of strain gauges
According to the sensitive gate material, it can be divided into three categories: metal, semiconductor and metal or metal oxide paste:
1. Metal strain gauges, including wire (wire wound, short-circuit) strain gauges, foil strain gauges and thin film strain gauges,
2. Semiconductor strain gauges, including bulk semiconductor strain gauges, diffusion type semiconductor strain gauges and thin film semiconductor strain gauges,
3. Metal or metal oxide slurry is mainly used to make thick film strain gauges.
Our shop is all foil-type metal strain gauges.
2. The main parameters of the strain gauge
1. Resistance value of strain gauge
The resistance of the strain gauge refers to the measured resistance value of the strain gauge in a room temperature environment, without installation and no force.
The selection of the resistance value of the strain gauge is mainly based on the requirements of the measuring object and the measuring instrument.
2. Sensitivity coefficient of strain gauge
The sensitivity coefficient of the strain gauge refers to: when the strain gauge is pasted on the surface of the test piece in a unidirectional stress state, and its longitudinal direction (the direction of the longitudinal line of the sensitive grid) is parallel to the stress direction, the resistance change rate of the strain gauge and the surface of the test piece The ratio of the strain along the stress direction at the patch (that is, the strain along the longitudinal direction of the strain gauge), that is, where K is the sensitivity coefficient of the strain gauge, ? is the measurement point on the surface of the specimen parallel to the longitudinal direction of the strain gauge's sensitive grid Strain, RR? is the relative change in strain gauge resistance caused by ?.
The sensitivity factor of the strain gauge mainly depends on the sensitivity factor of the sensitive grid material, but the two are not equal. This is mainly due to two reasons: Taking the wire strain gauge as an example, due to the existence of the horizontal grid, the The sensitivity factor is smaller than that of the wire, and the difference is related to the structure and geometric size of the sensitive grid, the deformation of the surface of the specimen is transmitted to the sensitive grid through the substrate and the adhesive, and the strain is caused by the influence of the transition zone at the end. The sensitivity coefficient of the gauge is smaller than that of the sensitive grid. This difference is not only related to the type and thickness of the substrate and adhesive, but also affected by the curing degree of the adhesive and the installation quality of the strain gauge. Therefore, the sensitivity coefficient of the strain gauge is a comprehensive index affected by many factors. It cannot be calculated through theoretical calculations, but is determined by the manufacturer after sampling and performing calibration tests on special equipment. And indicate its average nominal value and standard error on the package. The commonly used strain gauges have a sensitivity coefficient of 2.0 to 2.4.
3. The strain limit of the strain gauge
The strain limit of the strain gauge refers to the actual condition when the specimen with the strain gauge is gradually loaded under the condition of constant temperature, and the relative error between the indicated strain and the actual strain of the measured component (usually specified as 10%) does not exceed a certain value. Strain value. In fact, the strain limit means that the strain gauge does not exceed the specified non-linear error.
The sensitivity coefficient of most sensitive grid materials varies little within the elastic range, so in general, the main factors that determine the strain limit are:
a. The performance of the binder and the base material to transmit strain,
b. Arrangement of lead wire and sensitive grid solder joints,
c. The installation quality of the strain gauge.
Choosing adhesives and base materials with higher shear strength, making and installing the strain meter to control the base and adhesive layer not to be too thick, proper curing treatment, etc., all help to obtain a higher strain limit.
Increasing working temperature will significantly lower the strain limit, and the strain limit of medium temperature and high temperature strain gauges at the extreme working temperature is lower than that of normal temperature strain gauges.
4. Fatigue life of strain gauge
The fatigue life of a strain gauge refers to the number of cycles that the strain gauge continues to work under the action of alternating stress of constant amplitude until fatigue damage occurs.
When the strain gauge has one of the following three conditions, it can be considered as fatigue damage: a. The sensitive grid or lead wire is broken, b. The output amplitude of the strain gauge changes by 10%, c. Spike-like spikes appear on the output waveform of the strain gauge. .
The cause of fatigue damage is that, under the action of alternating strain during dynamic stress measurement, the sensitivity coefficient of the strain gauge will change as the number of strain cycles increases after several cycles. This is mainly due to the defects of the sensitive grid (pinholes and cracks on the grid), the change in the contact resistance of the internal solder joints, the decrease in adhesive strength, and the poor installation quality of strain gauges. To improve the fatigue life of strain gauges, special attention must be paid to the connection method between the lead wire and the sensitive grid and the quality of the solder joints.
Three, the structure of the strain gauge
The resistance strain gauge is mainly composed of a sensitive grid, a substrate, a lead wire, and a covering layer. The sensitive grid is glued between the substrate and the covering layer with an adhesive.
1. Sensitive grid-a grid made of alloy wire or alloy foil. It can convert the strain on the surface of the measured component into a relative change in resistance. At present, the commonly used metal sensitive grid materials mainly include copper-nickel alloy, nickel-chromium alloy, nickel-molybdenum alloy, iron-based alloy, platinum-based alloy, palladium-based alloy, etc.
2. Substrate-an integral part of the resistance strain gauge. Its function is to place the sensitive grid ground or temporarily on it before the strain gauge is installed on the test piece, and also to insulate the sensitive grid and the specimen to which the strain gauge is attached. Commonly used base materials are paper, film (epoxy resin, phenolic resin, polyester resin, polyimide, etc.), glass fiber cloth, metal foil, etc.
3. Lead wire—The lead wire of the resistance strain gauge is a wire-like or ribbon-like metal wire drawn from the sensitive grid. Usually the lead wire is connected to the sensitive grid when the strain gauge is manufactured and becomes a part of the strain gauge.
4. Cover layer—The cover layer of the resistance strain gauge is used to protect the sensitive grid from mechanical damage or to prevent oxidation at high temperatures. It is commonly used to make the base film or glass fiber cloth impregnated with organic glue (such as epoxy resin, phenolic resin, etc.) as the cover layer, and the adhesive used in the production of the sensitive grid can also be coated as a protection Floor. The material of the cover layer includes paper, plastic film and glass fiber cloth.
Fourth, the application and working principle of metal resistance strain gauges
Resistance strain gauges have two applications: one is as a sensitive element, which is directly used for strain measurement of the test piece, the other is as a conversion element, which constitutes a sensor through an elastic element, which can be used to transform any other strain that can be transformed into an elastic element. Physical quantities are measured indirectly. When measuring with a strain gauge, stick it on the surface of the object to be measured. When the measured object is deformed by force, the sensitive grid of the strain gauge is also deformed, and its resistance value changes correspondingly, which is converted into a voltage or current change through a conversion circuit, thereby realizing strain measurement.
The working principle of the metal resistance strain gauge is the resistance strain effect, that is, when the metal wire is subjected to stress, its resistance changes correspondingly with the magnitude of the mechanical deformation (stretching? Pinggu?). The theoretical formula of the resistance strain effect is as follows:
R=?*(L/S)
In the formula: ?—resistivity (?·mm2/m) L—the length of the wire (m) S—the cross-sectional area of the wire (mm2)
It can be seen from the above formula that when the metal wire undergoes mechanical deformation due to stress, ?, L, and S will all change, which will inevitably cause a change in the resistance value of the metal wire. When extended by an external force, the length increases, the cross-sectional area decreases, and the resistance value increases, when the pressure is shortened, the length decreases, the cross-sectional area increases, and the resistance value decreases. Therefore, as long as the change in resistance value can be measured, the strain of the wire can be known. This conversion relationship is
?R/R=Ko?
In the formula: R-the amount of change in the resistance value of the metal wire,
Ko-the strain sensitivity coefficient of metal materials, which is mainly determined by the test method, and is basically a constant value within the elastic limit,
?—The axial strain value of the metal material, that is, ?=?L/L, so ? is also called the length strain value. For metal wire, its value is between 0.24 and 0.4.
In practical applications, the metal resistance strain gauge is pasted on the surface of the elastic element of the sensor or the mechanical part under test. When the elastic element in the sensor or the measured mechanical part is strained by the force, the strain gauge attached to it will also undergo the same mechanical deformation, which causes the corresponding change in the resistance of the strain gauge. At this time, the resistance strain gauge converts the mechanical quantity into the change of resistance output.
Specification of BF series sold
Substrate: modified phenolic, grid wire: constantan (copper alloy containing 40% nickel and 1.5% manganese), fully enclosed structure, temperature self-compensation and creep self-compensation can be realized at the same time.
High precision, good stability, easy to use, suitable for 0.02 sensor.
Main Specifications
BF series
Typical resistance value
350 euros
Tolerance to average resistance
?±0.1%
Sensitivity coefficient
2.12
Sensitivity coefficient dispersion
?±1%
Strain limit
2.0%
Fatigue life
?1M
Temperature self-compensation coefficient
9,11,16,23,27
Operating temperature range
-30-+150
Grid Material Constantan foil
Substrate epoxy-modified phenolic
Base thickness (um) 32±1
Insulation resistance 10000 ohms
BF350-3AA (23) N8
Product model length x width 3.1x3.5
Base size length x width 7.1x4.5
N* in the strain gauge model is the creep mark. Different marks have different creep values. The law is:
(+) N9>N7>N5>N3>N1>N0>N8>N6>N4>N2>T0>T2>T4>T6>T8>T1>T3>T5 (-) Actual creep value between adjacent labels 0.01-0.015%FS/30min
Circuit principle (see figure):
Usually the sensor uses four pieces of equivalent resistors to form a bridge circuit such as Whitten. R and B are input terminals, G and W are output terminals, and RS functions as a protection circuit. Adjust the zero balance of the circuit by adjusting RS and R1.


